I can’t tell you how many hours I have spent trying to find a recipe for a low carb bread that tastes and feels like bread. So many recipes that don’t have wheat flour just don’t live up to the hype – the lack of gluten makes them just a bit like a bland cake. I’ve seen lots of recipes for gram flour bread but when it comes down to it they are either wheat flour breads with a little bit of gram flour or gram flour savoury cakes. We wanted a bread that performs like proper bread. One you can slice and toast and smother with marmite!
I have some Vital wheat gluten, which provides the gluten protein to flour without the carb content but just could not find any recipes where that was added to non-wheat flours with any success.
So this weekend, I had yeast and time to spare. I did some research and noted a few blogs where they had apparently tried to make bread with non-wheat flour and adding gluten but no recipes as all seemed to conclude it was an out and out failure. One thing I did glean from reading was that none seemed to be giving the yeast anything to eat, which is why I chose skimmed milk (higher in lactose than full fat milk) and a little honey – don’t worry about the carbs in the honey – the yeast will consume that.
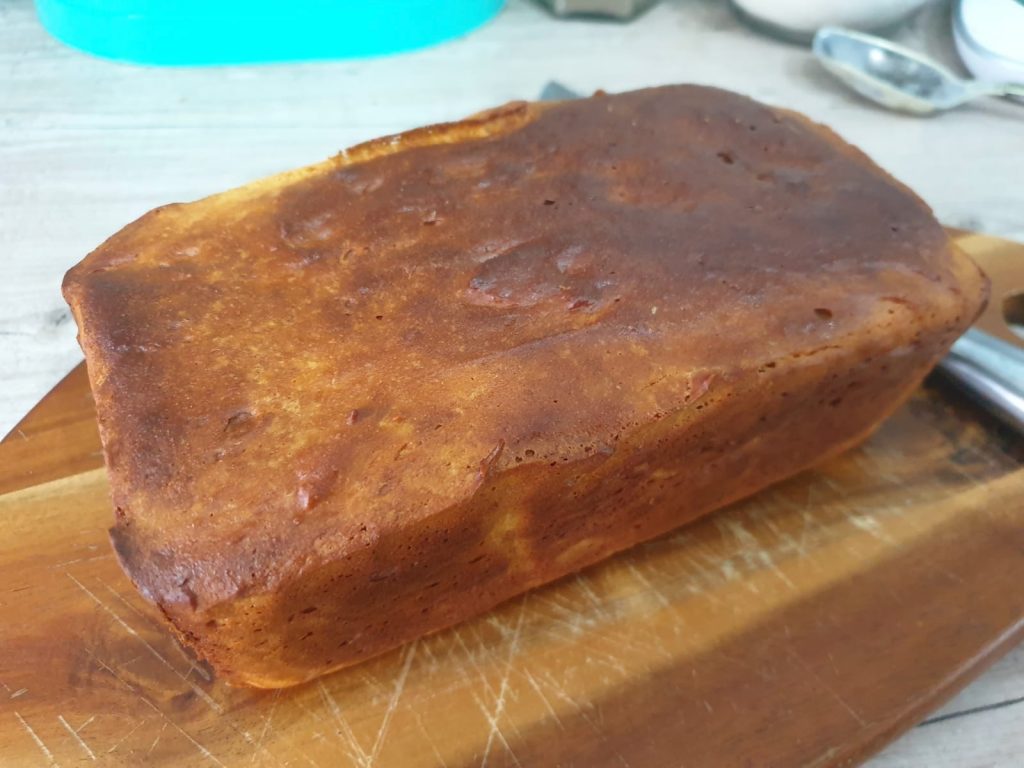
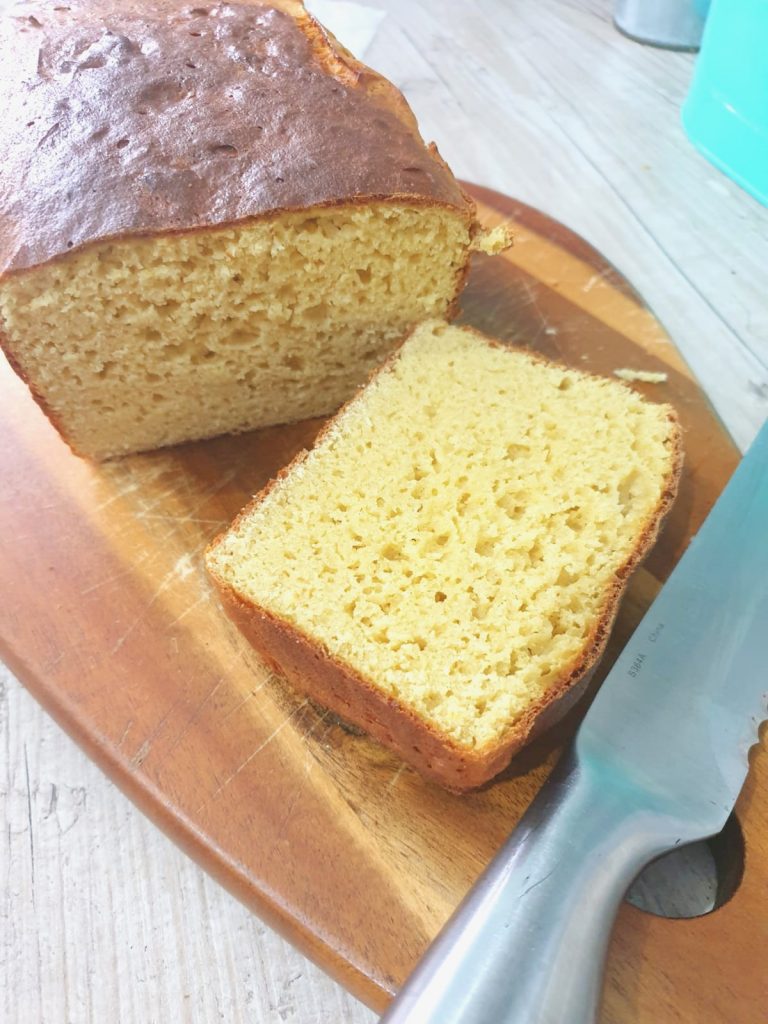
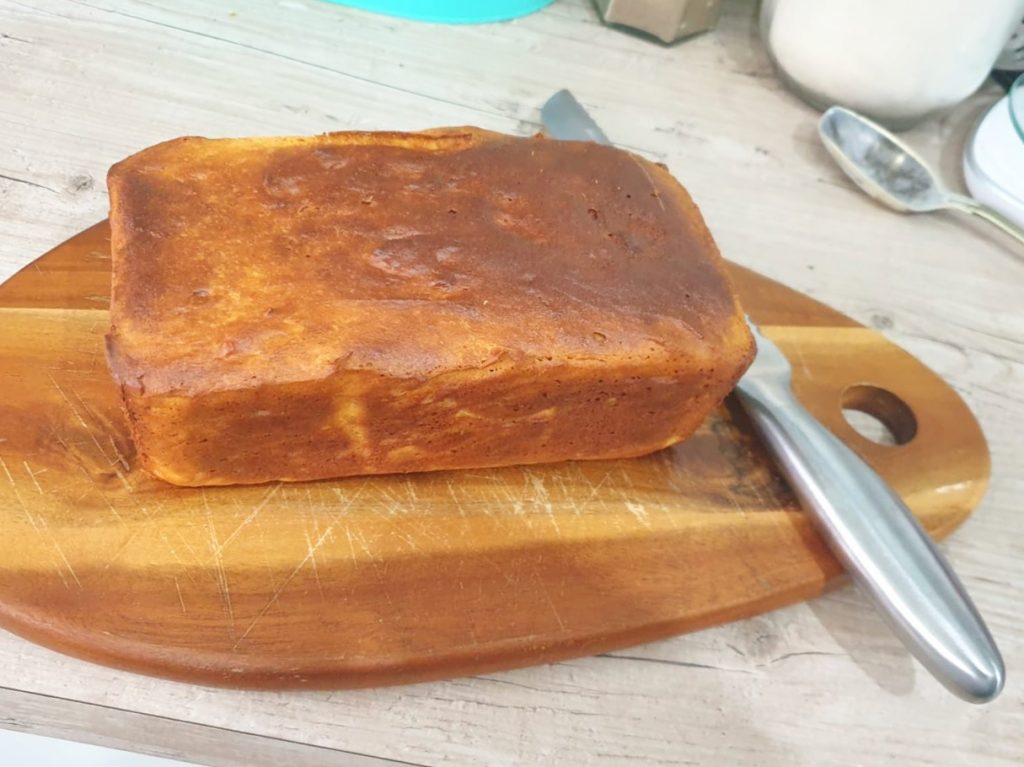
We went ahead and tried anyway! And success – we ended up with this bread, which looks like bread, tastes like bread and even feels like bread. It isn’t the nicest bread in the world admittedly but it isn’t nasty either. I’m going to spend some time tweaking it a bit to see if I can improve it and I think a big part of that will simply be to make a bigger loaf next time. I didn’t want to make it too big this time as I didn’t want to throw away ingredients if it turned out to be nasty!
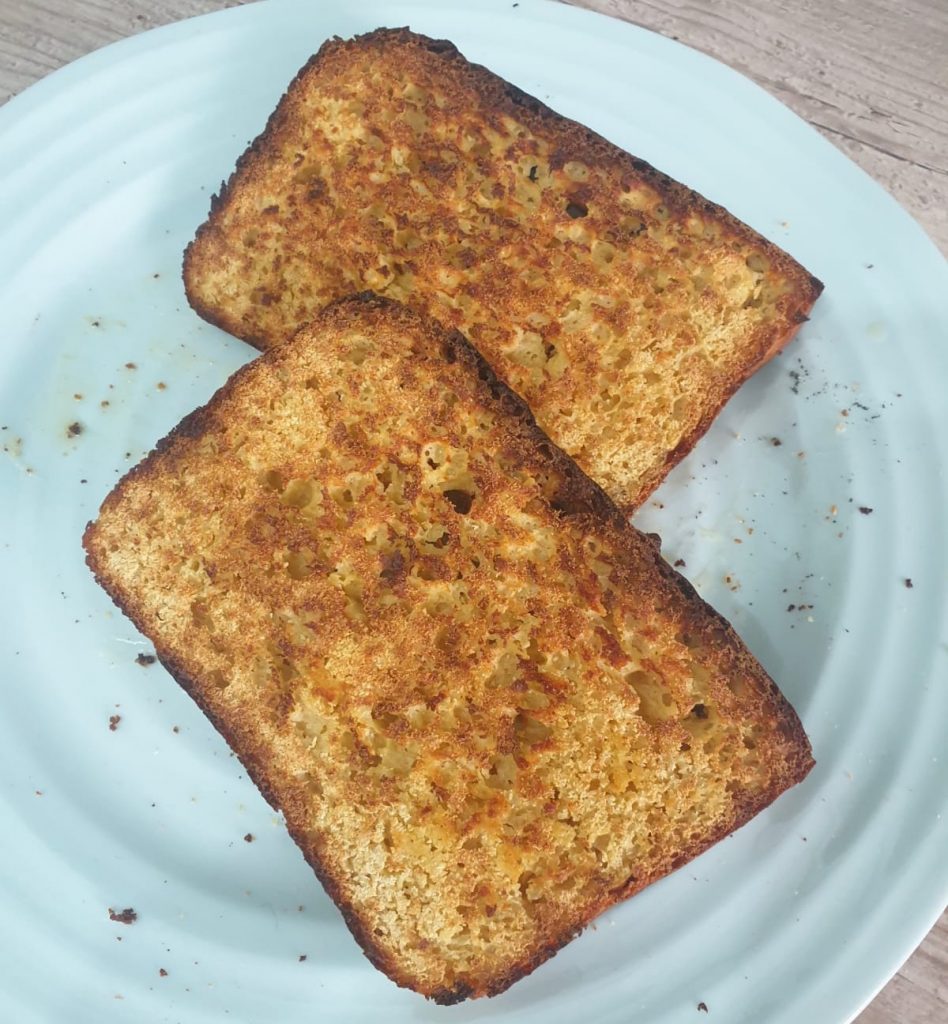
The look on the face of the man of the house when he got to eat a sausage sandwich for supper last night was really quite something – he’s not been able to do that for some years. And this morning he had marmite on toast – I have to admit that New Zealand marmite knocks the stuff you get here off the shelf – really good.
This will be really sticky if you try it out for yourself – even the Paul Hollywood oiled hands didn’t help. It is supposed to be like that!
Remember that this is baking and baking is as much a science as an art so the measurements need to be quite precise – that’s a bit of an anathema to me – I find writing out recipes so hard as I tend to eyeball everything and I very, very rarely stick to somebody else’s recipe. I’m not sure which of the elements of this bake make the difference yet – that’s going to be phase two and the subject I imagine of further posts.
I used gram flour this time – I only recently realised that gram and besan are not quite the same thing. One (gram) is purely chickpeas and the other (besan) is chickpea and yellow split peas. They seem to behave in pretty much the same way in other recipes but I couldn’t vouch for it here. I have mentioned very specifically the brand of milk I used as I don’t know to what degree its chemical makeup had an impact on the process. Area Bob is a fortified skimmed milk – I think they effectively “reduce” the milk so it isn’t like the weak dishwater one might normally associate with skimmed milk.

Ingredients
300g gram flour
40g vital wheat gluten
300ml Arla Bob milk
12g fresh yeast
1 tablespoon honey
1/4 teaspoon salt
Method
- Line a bread tin with baking parchment
- Warm the milk in the microwave on a low setting for a few minutes to bring it up to around body temperature – it won’t matter if it is a little warmer but if it’s too hot you might kill off the yeast
- In a small cup or bowl, stir the warm milk, yeast and honey together until it the yeast is fully dissolved in the liquid and there are no lumps
- In a stand mixer with the dough hook (or an electric hand mixer if you have one with a dough hook) mix together the vital wheat gluten and gram flour for a minute or so to ensure the wheat gluten is evenly incorporated
- Add in the milk and yeast mixture and keep mixing
- Use the remaining milk to “rinse” out any yeast remaining in the cup and add that to the dough, which will be quite wet and sticky
- Keep mixing, gradually increasing the speed so that the dough is mixed for around 8 minutes and will look quite shiny in appearance
- Add in the salt by sprinkling it over the dough and then mix for a further two minutes (I did this to make sure the salt didn’t start retarding the yeast too soon). I also think you could leave out the salt all together if you wanted or sprinkle some rock salt over the dough just before it goes into the oven in order to give it a slightly corn bread style topping
- Oil your hands (it doesn’t work perfectly but without it I think it would be terrible)
- Scoop out the dough into the lined bread tin, cover with a slightly damp tea towel and leave in a warm place to rise for at least 2 hours – I took a look at 1 hour when it had almost doubled but by 2 hours it had more than doubled in size
- After 2 hours, heat your oven to 200C and once it has reached temperature, remove the tea towel and out the bread in to bake for 35 minutes
- Remove the bread from the tin and leave to cool on a wire rack – then slice and enjoy.
- If you want to use for toast, then the bread needs to be sliced quite thinly.